
 English
 中文
中文 Русский язык
 한국어
한국어
How to Install a Sanitary Butterfly Valve with Clamp Connection | Qiming

 by admin
You have selected a sanitary butterfly valve for your hygienic processing line—perhaps in dairy, beverage, pharmaceutical, or biotech. Now comes the critical step: installing it correctly. Unlike welded or flanged connections, a clamp connection offers speed and flexibility. But speed does not mean you can skip the details. A poorly installed clamp valve can lead to leaks, contamination risks, and unplanned downtime. This guide walks you through the entire installation process—from preparation to final testing—so you can achieve a reliable, leak-free connection every time.
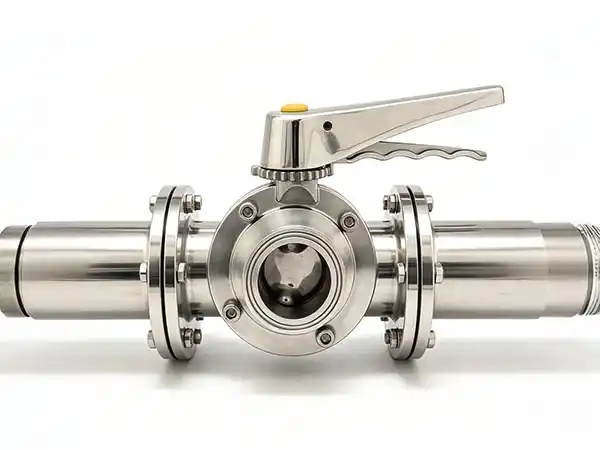
Understanding the Clamp Connection for Sanitary Butterfly Valves
Before diving into the installation steps, it is worth understanding what makes a clamp-end sanitary butterfly valve different from other connection types.
A clamp-end valve uses a tri-clamp fitting: the valve sits between two pipe ferrules, with a gasket in between, and a clamp secures the assembly. This design offers several practical advantages:
-
No welding required: Installation does not require specialized welding skills or equipment.
-
Quick installation and removal: Valves can be installed or removed in minutes, which is especially valuable for systems that require frequent cleaning, inspection, or reconfiguration.
-
Tool-free or minimal-tool operation: Many clamp connections can be secured by hand or with a basic wrench.
-
Easy access for CIP/SIP: Clamp connections allow quick access to internal components without shutting down the entire process for extended periods.
However, this convenience comes with a responsibility: because the connection relies on mechanical clamping rather than a permanent weld, proper alignment, gasket placement, and even tightening are essential to prevent leaks and maintain hygienic integrity.
Step-by-Step Installation Guide for a Clamp-Connection Sanitary Butterfly Valve
Follow these steps to install your sanitary butterfly valve with a clamp connection correctly.
Prepare the Work Area and Components
Preparation is often the most overlooked step, yet it directly determines the success of the installation.
-
Depressurize and drain the system: Before any installation work, ensure the pipeline is depressurized and fluids are safely evacuated.
-
Clean the pipe ends: The inner surface of the pipe and the ferrules must be clean and free of debris, dirt, or residue. In sanitary applications, cleanliness is paramount—any foreign particle can compromise product quality.
-
Inspect the valve: Check the sanitary butterfly valve for any damage, defects, or missing parts. Pay special attention to the sealing surfaces and the disc.
-
Verify the clamp and gasket: Ensure the clamp size matches the valve and pipe ferrules. Check that the gasket is clean, undamaged, and compatible with your process media.
Why this matters: Dirt or grit on the sealing faces can prevent a proper seal, leading to internal leakage or product contamination. A few minutes of preparation can save hours of troubleshooting later.
Position the Valve Correctly
With everything prepared, it is time to place the valve.
-
Align the valve with the pipeline: Position the valve between the two pipe ferrules. Ensure the valve's flow direction marking (if present) matches the intended media flow direction.
-
Check the disc position: Ensure the butterfly disc is in the closed position during installation. This prevents damage to the seat or disc while you are handling and securing the valve.
-
Center the valve: The valve must be centered between the ferrules before clamping. Do not use the clamp to forcefully pull misaligned components into position.
Why this matters: Forcing misaligned components can distort the valve body or damage the seals, creating leak paths that are difficult to diagnose later.
Insert the Gasket and Secure the Clamp
This is the core of the clamp connection installation.
-
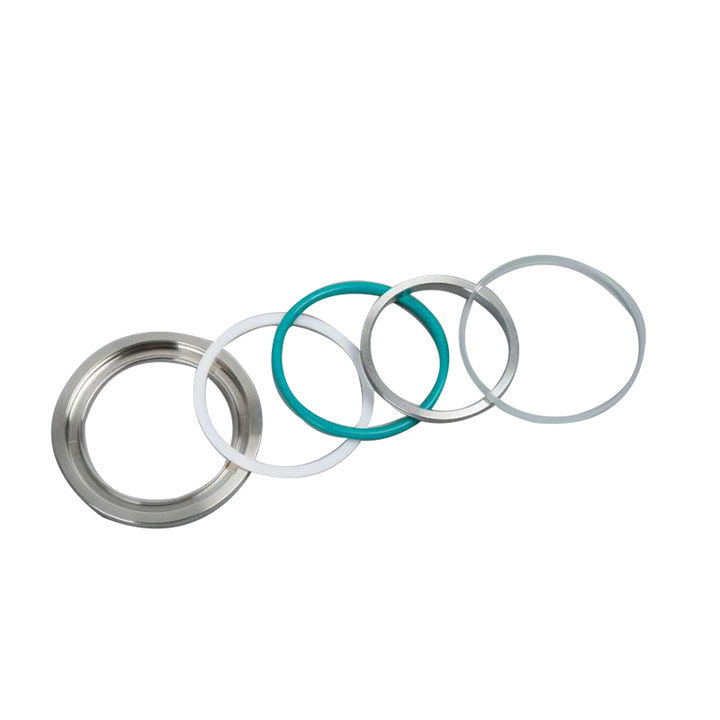
Place the gasket: Insert the sanitary gasket between the valve ferrule and the pipe ferrule. Ensure the gasket is properly seated and aligned.
-
Position the clamp: Place the clamp around the two ferrules, enclosing the gasket.
-
Tighten the clamp evenly: Begin tightening the clamp bolt or wing nut. Tighten gradually and evenly—do not fully tighten one side before the other. Use a cross-tightening pattern if the clamp has multiple bolts.
-
Apply the correct torque: While many clamps can be hand-tightened, achieving a consistent seal often requires a specific torque. For example, one manufacturer specifies a minimum torque of 50 Nm ± 5 for clamp bolts. Always refer to your valve manufacturer's torque specifications.
-
Ensure full contact: When properly tightened, the valve flange should be in full contact with the pipe flange.
Why this matters: Uneven tightening is one of the most common causes of leaks. It creates uneven sealing pressure, which can distort the gasket or the clamp itself. Gradual, even tightening ensures the gasket compresses uniformly, creating a reliable seal.
Perform Functional and Leak Tests
Installation is not complete until you have verified the valve works as intended.
-
Manual open/close test: Before pressurizing the system, manually open and close the valve several times to check for smooth operation. The disc should move freely without binding.
-
Leak test: Under normal working pressure, check for any leakage around the valve seals and clamp connections. If you detect a leak, do not simply tighten the clamp further—re-evaluate the gasket placement and alignment.
-
Initial operation: Some manufacturers recommend opening and closing the valve three times before normal operation to properly seat the seals.
Why this matters: A leak test under pressure is the only way to confirm that your installation is truly secure. Catching a leak during testing is far less costly than discovering it during production.
Common Installation Mistakes to Avoid
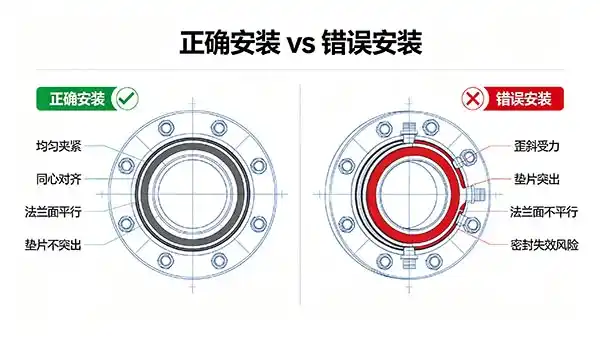
Even experienced technicians can make errors. Here are the most common pitfalls and how to avoid them:
| Mistake | Consequence | How to Avoid |
|---|---|---|
| Installing with the disc open | Damages the seat or disc during handling | Always keep the disc closed during installation |
| Uneven clamp tightening | Distorted clamp, uneven seal pressure, leaks | Tighten gradually in a cross pattern |
| Using the valve handle as a lever | Damages the valve or pipe connection | Never use the handle to force the valve into position |
| Misaligned ferrules | Gasket not seated properly, leak paths | Center the valve before clamping |
| Dirty sealing surfaces | Contamination risk, poor seal | Clean all surfaces thoroughly before installation |
| Incorrect gasket type or size | Leaks, incompatibility with process media | Verify gasket material and size match your application |
Real-World Application Scenarios
Dairy Processing Plant
A dairy processor needs to install a 2-inch sanitary butterfly valve on a pasteurized milk line. The line requires frequent CIP cleaning, so the maintenance team chooses a clamp-end valve for easy removal and access. During installation, the technician ensures the disc is closed, cleans both ferrule faces, centers the valve, and tightens the clamp evenly to the manufacturer's specified torque. The result: a leak-free connection that can be quickly disassembled for inspection or cleaning without disrupting the entire production schedule.
Pharmaceutical Formulation Facility
A biopharmaceutical facility installs sanitary butterfly valves on a WFI (Water for Injection) loop. The installation team follows ASME BPE guidelines for surface finish and hygienic design. They pay special attention to gasket selection—using a PTFE gasket compatible with high-purity water—and verify that the clamp connection creates no crevices where bacteria could proliferate. The clamp connection allows the valves to be removed for periodic validation and maintenance, supporting the facility's rigorous quality assurance protocols.
Next Steps—From Installation to System Integration
By now, you have a clear, step-by-step framework for installing a sanitary butterfly valve with a clamp connection. The key takeaways are: prepare thoroughly, keep the disc closed during installation, center the valve before clamping, tighten evenly, and always test for leaks under pressure.
Once you have mastered the installation technique, the next logical step is to understand how different valve types and connection methods compare for your specific application. You may also want to explore how to select the right valve size, material, and seal type for your process conditions.
Understanding the full range of sanitary valve options—from butterfly valves to other hygienic valve types—will help you design more efficient and reliable processing systems.
Related Reading
-
Sanitary Check Valve vs Pressure Relief Valve – Differences
-
Is a Stainless Steel Mixproof Valve Worth for CIP Lines?
-
How to Select the Right Sanitary Valve for Your Dairy Processing Line
-
Understanding Gasket Materials for Sanitary Clamp Connections
-
Clamp-End vs. Weld-End Sanitary Valves: Which One Fits Your System?
This article is part of Qiming’s technical content library. No direct sales or pricing information is included. All technical discussions aim to help you make informed purchasing decisions.